Have you ever wanted to add a personal touch to your website with an animated signature? In this tutorial, I'll walk you through the entire process of creating a signature drawing effect—from sketching your signature in Figma with an Apple Pencil to implementing the animation in React.

Step 1: Creating Your Signature in Figma
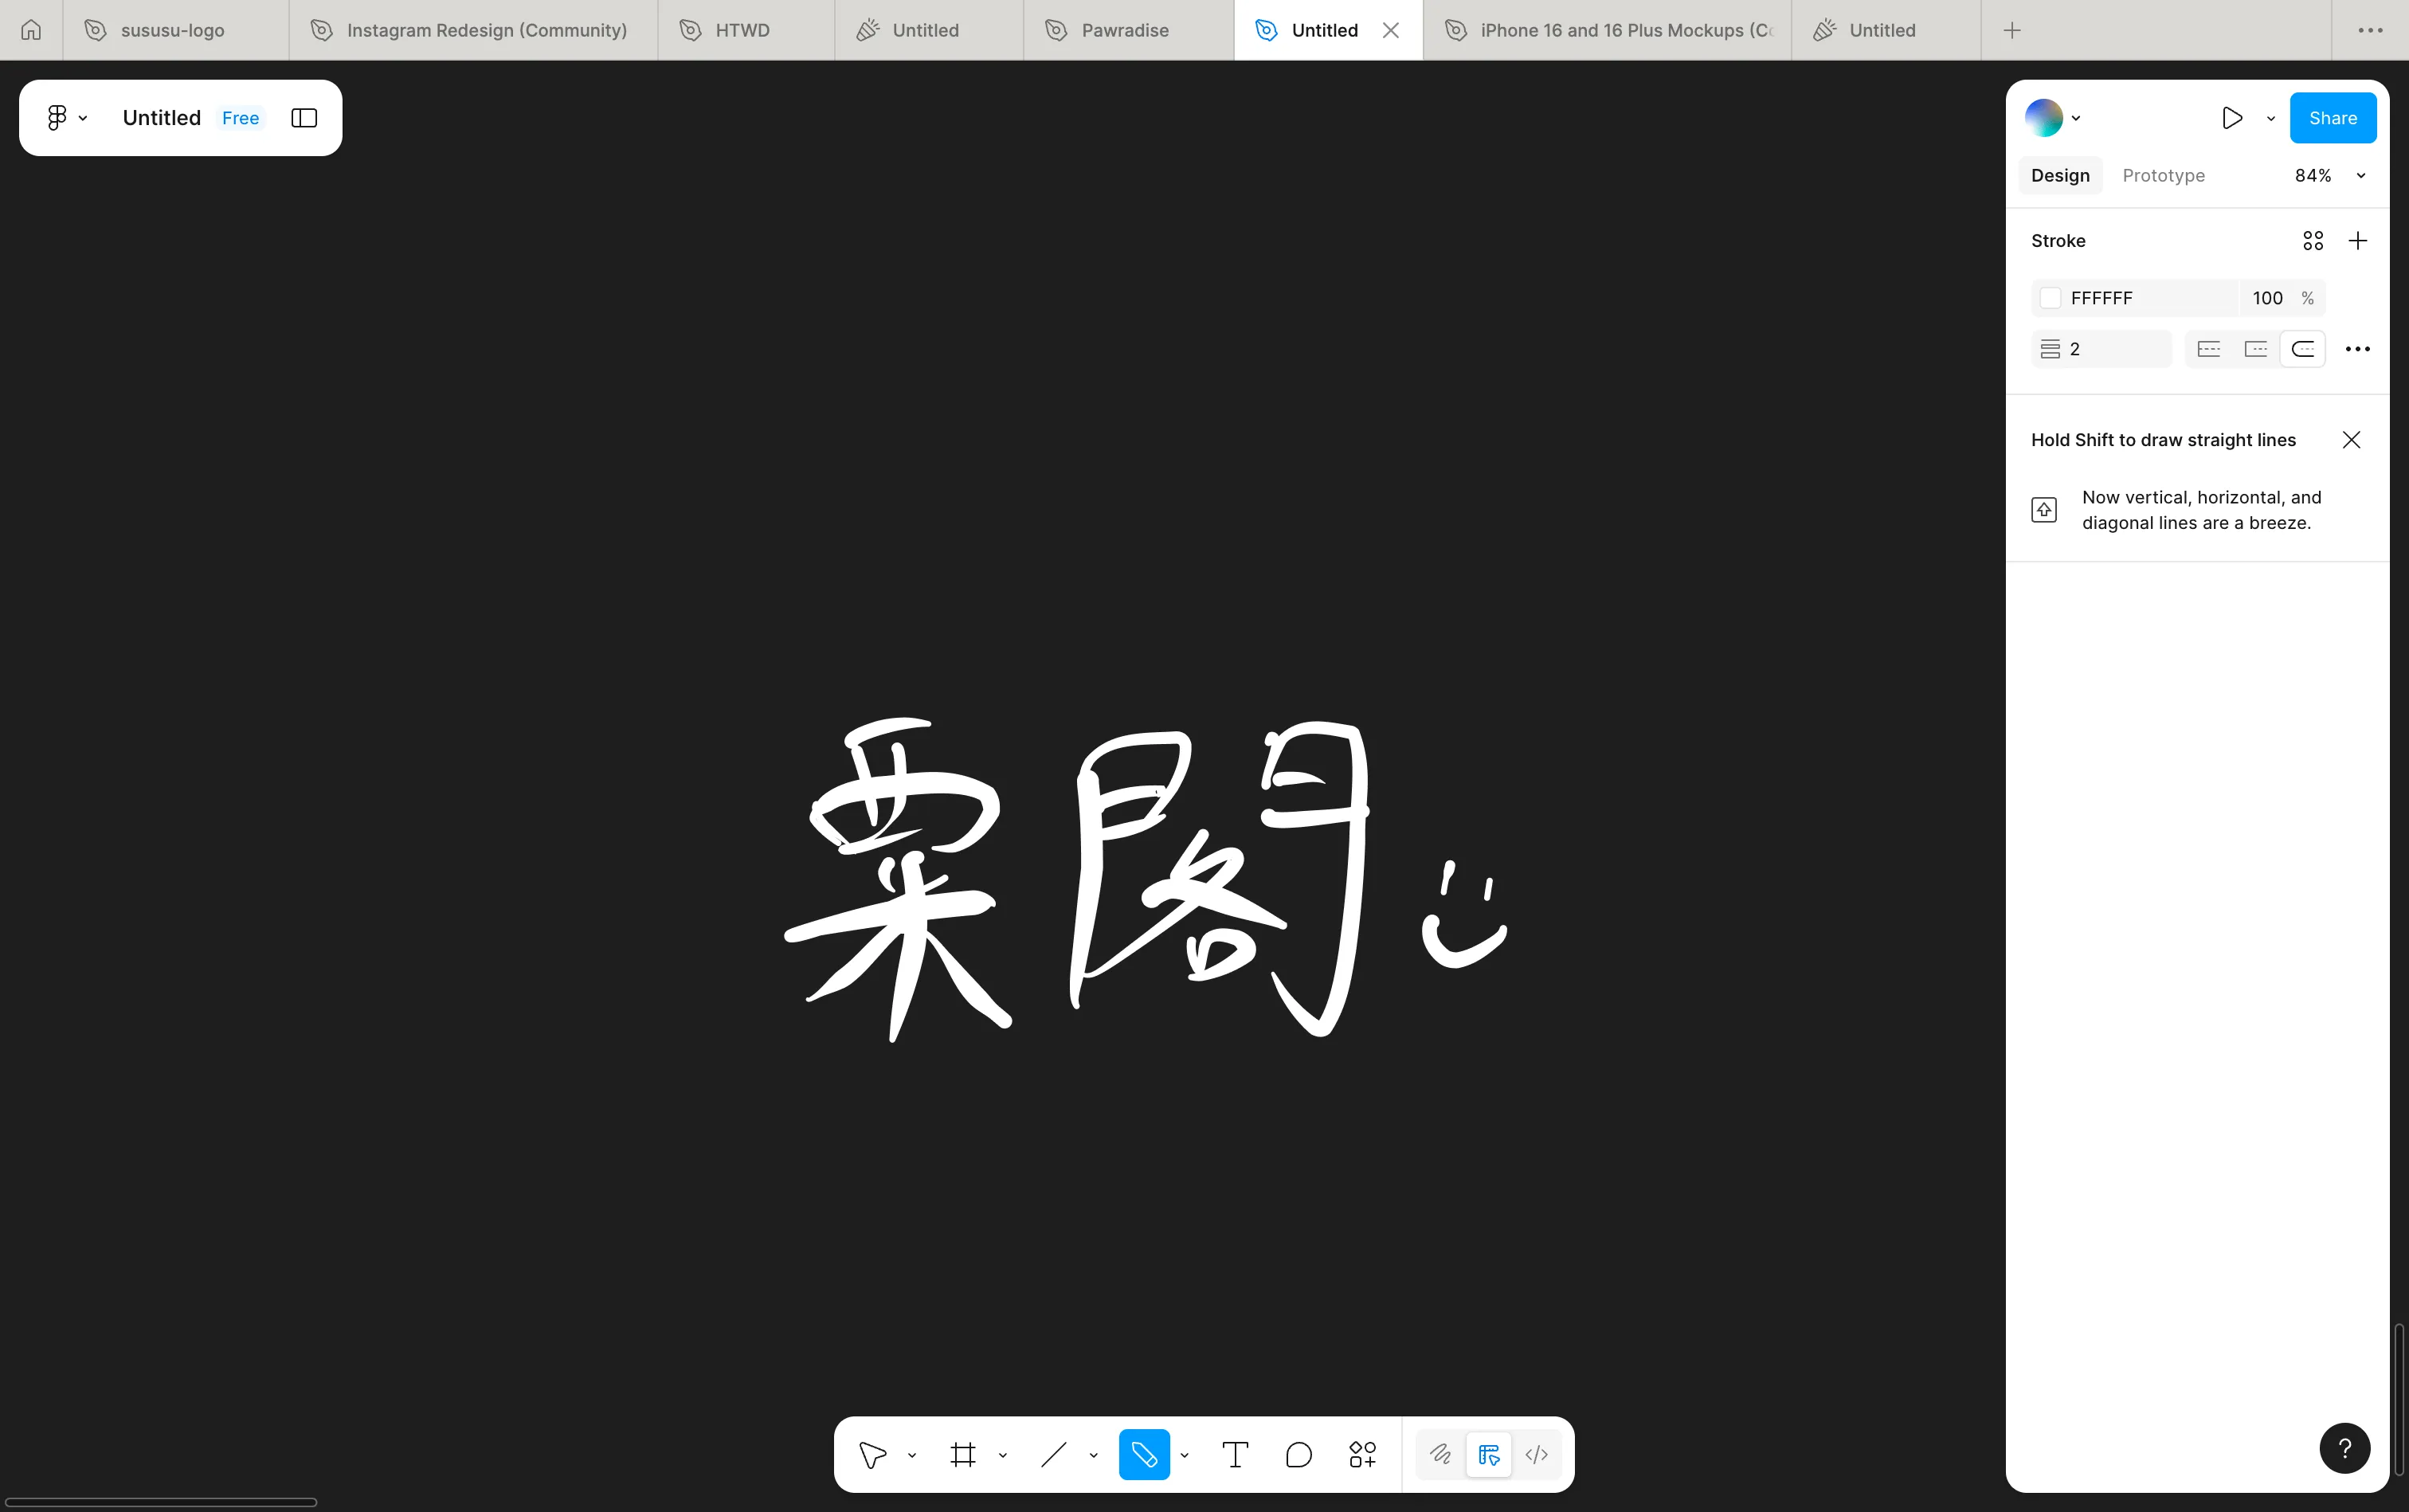
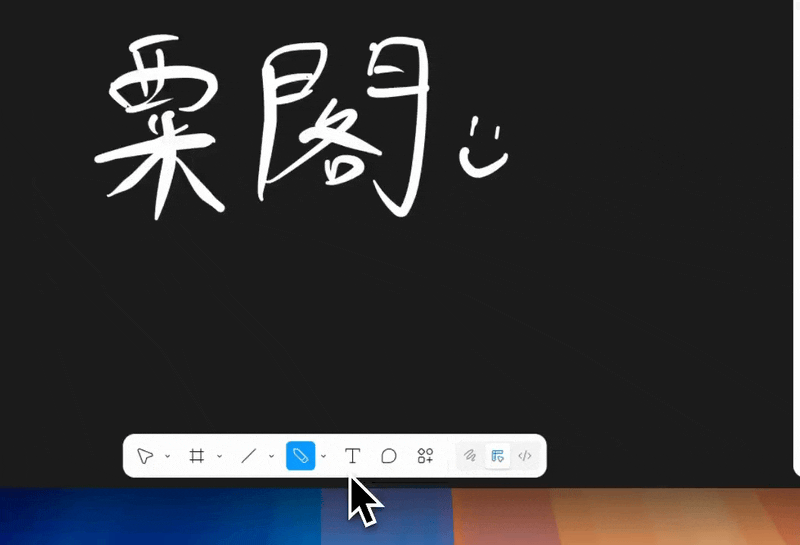
The first step is to create your signature using Figma's pencil tool. If you have an Apple Pencil (or any stylus), this process becomes much more natural and authentic.
- Open Figma and create a new frame or design file
- Select the Pencil Tool (shortcut:
P) - Connect your Apple Pencil to your iPad or use it with your Mac
- Write your signature naturally on the canvas
The pencil tool will create a vector path that follows your hand movements, capturing the organic flow of your signature.
Step 2: Making Stroke Width Consistent
When you first draw your signature, the stroke width might vary based on pressure sensitivity. For a clean, consistent look in the final animation, we need to standardize the stroke width.
- Select your signature path (or all paths if your signature consists of multiple strokes)
- In the right panel, find the Stroke section
- Set a consistent stroke width—I recommend
5pxfor a good balance between visibility and elegance - Set stroke cap to "Round" (
stroke-linecap="round") for smoother line endings - Set stroke join to "Round" (
stroke-linejoin="round") for smoother connections between path segments
If your signature has multiple separate paths (which is common for handwritten signatures), make sure to apply these settings to all paths.
Step 3: Exporting as SVG
Now that your signature is ready, we need to export it as an SVG file.
- Select all the paths that make up your signature
- Right-click and select "Copy as SVG" or use the export panel
- Save the SVG file to your project's
publicfolder (e.g.,public/sign.svg)
Alternatively, you can:
- Select the paths and use File → Export → SVG
- Copy the SVG code directly from Figma's code panel
Your SVG should look something like this:
<svg width="538" height="242" viewBox="0 0 538 242" fill="none" xmlns="http://www.w3.org/2000/svg">
  <path d="M48.3386 16.2866C48.6824 14.0341..." stroke="white" stroke-width="5" stroke-linecap="round"/>
  <path d="M21.9851 63.5965C20.4425 66.1817..." stroke="white" stroke-width="5" stroke-linecap="round"/>
  <!-- More paths... -->
</svg>
Important: Make sure each stroke is a separate <path> element. This is crucial for the animation to work correctly, as each path will be animated sequentially.
Step 4: Building the React Component
Now let's create a React component that will animate your signature. The component will:
- Fetch and parse the SVG file
- Extract all path elements
- Animate each path sequentially using CSS animations
Here's the complete component:
'use client';

import { useEffect, useRef, useState } from "react";

interface Props {
  src?: string;
  reverseOrder?: boolean;
}

export function SignatureDrawing({
  src = "/sign.svg",
  reverseOrder = false,
}: Props) {
  const [paths, setPaths] = useState<string[]>([]);
  const svgRef = useRef<SVGSVGElement>(null);
  const [shouldAnimate, setShouldAnimate] = useState(false);
  const hasAnimatedRef = useRef(false);
  const delayRef = useRef<NodeJS.Timeout | null>(null);

  // Fetch and parse the SVG file
  useEffect(() => {
    let mounted = true;
    fetch(src)
      .then((res) => res.text())
      .then((text) => {
        if (!mounted) return;
        const parser = new DOMParser();
        const doc = parser.parseFromString(text, "image/svg+xml");
        const extracted = Array.from(doc.querySelectorAll("path"))
          .map((node) => node.getAttribute("d") ?? "")
          .filter(Boolean);
        const d = reverseOrder ? extracted.reverse() : extracted;
        setPaths(d);
      })
      .catch(() => {
        // Handle errors gracefully
      });
    return () => {
      mounted = false;
    };
  }, [src, reverseOrder]);

  // Intersection Observer to trigger animation when in view
  useEffect(() => {
    const svgEl = svgRef.current;
    if (!svgEl || hasAnimatedRef.current) return;
    const observer = new IntersectionObserver(
      (entries) => {
        entries.forEach((entry) => {
          if (!entry.isIntersecting || hasAnimatedRef.current) return;
          hasAnimatedRef.current = true;
          delayRef.current = setTimeout(() => {
            setShouldAnimate(true);
          }, 300);
          observer.disconnect();
        });
      },
      { threshold: 0.3 }
    );
    observer.observe(svgEl);
    return () => {
      observer.disconnect();
      if (delayRef.current) clearTimeout(delayRef.current);
    };
  }, [paths]);

  // Apply animation to each path
  useEffect(() => {
    if (!svgRef.current) return;
    const nodes = svgRef.current.querySelectorAll<SVGPathElement>("path");
    let cumulative = 0;
    nodes.forEach((node) => {
      const length = node.getTotalLength();
      const duration = Math.max(0.08, length / 800);
      node.style.setProperty("--path-length", `${length}`);
      node.style.strokeDasharray = `${length}`;
      node.style.strokeDashoffset = `${length}`;
      if (shouldAnimate) {
        node.style.animation = `signature-draw ${duration}s ease forwards`;
        node.style.animationDelay = `${cumulative}s`;
      } else {
        node.style.animation = "none";
        node.style.animationDelay = "0s";
      }
      cumulative += duration;
    });
  }, [paths, shouldAnimate]);

  return (
    <div className="relative w-40">
      <svg
        ref={svgRef}
        viewBox="0 0 770 303"
        className="signature-svg"
        role="img"
        aria-label="Handwritten signature animation"
      >
        {paths.map((d, idx) => (
          <path key={idx} d={d} className="signature-stroke" />
        ))}
      </svg>
    </div>
  );
}
How It Works
-
SVG Parsing: The component fetches the SVG file and uses
DOMParserto extract all<path>elements and theirdattributes. -
Intersection Observer: The animation only triggers when the signature comes into view, improving performance and user experience.
-
Sequential Animation: Each path is animated with a cumulative delay, so they draw one after another, creating a natural writing effect.
-
Dynamic Duration: The animation duration is calculated based on the path length (
length / 800), so longer strokes take more time to draw.
Step 5: Adding CSS Animations
The magic happens in the CSS. We use stroke-dasharray and stroke-dashoffset to create the drawing effect:
.signature-svg {
  width: 160px;
  height: auto;
}

.signature-stroke {
  fill: none;
  stroke: currentColor;
  stroke-width: 4;
  stroke-linecap: round;
  stroke-linejoin: round;
  animation-name: signature-draw;
  animation-fill-mode: forwards;
  animation-timing-function: ease;
}

@keyframes signature-draw {
  to {
    stroke-dashoffset: 0;
  }
}
The Animation Technique
The drawing effect uses a classic SVG animation technique:
stroke-dasharray: Sets the dash pattern to the full length of the pathstroke-dashoffset: Initially set to the full length, hiding the stroke- Animation: Animates
stroke-dashoffsetto0, revealing the stroke progressively
This creates the illusion of the path being drawn from start to finish.
Step 6: Using the Component
Now you can use the component anywhere in your app:
import { SignatureDrawing } from "@/components/signature-drawing";

export default function Page() {
  return (
    <div className="flex justify-center pb-12">
      <SignatureDrawing src="/sign.svg" />
    </div>
  );
}
Props
src: Path to your SVG file (default:"/sign.svg")reverseOrder: Iftrue, animates paths in reverse order (default:false)
Tips and Tricks
-
Optimize Your SVG: Remove unnecessary attributes from Figma's export to keep the file size small.
-
Adjust Animation Speed: Modify the
length / 800calculation in the component to make the animation faster or slower. -
Customize Colors: The stroke uses
currentColor, so it will inherit the text color from its parent. You can override this in CSS. -
Multiple Signatures: You can create different signature styles and switch between them using the
srcprop. -
Accessibility: The component includes
role="img"andaria-labelfor screen readers.
Conclusion
Creating a signature drawing effect adds a personal, elegant touch to your website. The combination of Figma's pencil tool for authentic handwriting and CSS animations for smooth drawing creates a delightful user experience.
The key is in the details: consistent stroke widths, proper SVG structure, and sequential path animations. With this tutorial, you should be able to create your own signature animation in no time!
Feel free to experiment with different stroke widths, animation speeds, and timing functions to match your design aesthetic. Happy coding! ✍️